Showing posts with label chocolate. Show all posts

Wednesday, July 11, 2012

Emergency Cake Surgery

(Finished cake)

So a few weeks back my former English teacher had a birthday and he is so awesome I decided to make him a cake. Its a very simple cake with stenciled words I cut out myself and chocolate frosting. Just so all of you know, making your own stencils is a pain in the butt. First you have to find what you want to stencil, then adjust the size on the computer, print it off, and finally cut it out. If it is small its not so bad, but apparently cutting out "Happy Birthday" in fancy font is no easy feat.

(Stenciled words made out of sugar sprinkles.)
(Homemade stencils.)

The first attempt at the cake did not go so well. I had tried to make it a chocolate cake with delicious whipped ganache filling and a chocolate buttercream icing, however I accidentally over mixed the ganache (at least I think that's what I did) and it didn't quite turn out correctly. I tried to salvage it and make it work and, even though it tasted just fine, it refused to stay between the layers. I quickly iced the cake trying to trap it in but still the ganache found a way out by pushing the icing off. I quickly stuck it in the fridge to try to firm it up, however my attempt were futile and I was left with this:

(Whipped ganache pushing icing off the cake)
 
After realizing my original plan would not work i tried to use what I was left with by pulling the layers of cake apart and scraping off the ganache. It was important to get all the ganache off so that the cake wouldn't absorb it and become too moist. I then re-iced the cake and stenciled on the words. The chocolate buttercream frosting (recipe page) was a huge hit. I received multiple compliments on it and some people said that was their favorite part. After everyone got through with the cake I was left with only leftover icing to take home (pictured below). However my friend Shelby later got a hold of the cake carrier and when she was done it did not look like there had been a cake on it at all.
(The cake after the party was over)

Monday, May 21, 2012

Five-Minute Chocolate Cake

So for all you girls out there, I know that you , like me, often get chocolate cravings. Mine are constant and I'm always wanting a nice big hunk of chocolate cake with some fudge on top. Mmmmm. That is the best. So when a friend of mine gave me a recipe for a chocolate cake in a cup that only takes five minutes to make I had a field day. It is so delicious and if you make it right it is so moist.
(A picture of my cake in a cup and some yummy syrup for on top.
Yes, this is my own picture.)

Now the recipe says that it is optional to add the syrup on top. I tried it first with out and while it was good, it was definitely missing something. So I got into our fridge and dug around and viola! Smucker's Chocolate Sundae Syrup. I drizzled some over top and Oh! it was the icing on the cake (pun intended even if it was cheesy). Also, I recommend making it with normal sized chocolate chips not the mini ones. I made it with the minis the first time and it turned out rather dry but when i used normal sized ones it was quite moist. Make sure the mug you are using is microwave safe and it won't blow up in any one's faces or have gold paint start a fire or anything like that. I do not take any responsibility for any kitchen accidents, not that they are likely. One last thing. The amount of cake the recipe produces can be quite a lot so don't eat it when you are too full. Enjoy!

Monday, January 16, 2012

Happy Thanksgiving & Merry Christmas

So sorry about the long wait! You know the holidays. Rush, rush, rush. So i supposed I'd better start out with the items i bakes for Thanksgiving. To begin, i only made two items. Rugelach cookies and lemon meringue pie. Rugelach is a type of cookie originating somewhere in the Middle East. I have had people from Iraq tell me they are Iraqi cookies and people from Israel say they are Israeli and books tell me they are Jewish, but it is always somewhere in the Middle East so that is all i can tell you about their background. The recipe I use may not be quiet as authentic as you might find in the Middle East, but some personal friends of mine from Iraq say the recipe is very authenic.

It is a small cookie in the shape of a cresant with a chocolate filling most commonly but it can have other fillings as well. To make it you simly mix up the dough, refidgerate it for awhile, roll it out, spinkle the filling, cut into wedges and roll. If you are feeling lazy or are in a hurry, you can skip the wedges, roll, and then cut, making the cookies more of a pinwheel than a cresant. Be careful of adding too much filling or the cookie will be messy. It is absolutely delicious. The dough is sweet and soft, and so creamy (probably a result of the cream cheese) and the filling is chocolately with a hint of cinnomin making the chocolate filling irrisistable.
Also for Thanksgiving I made a Lemon Merinque Pie, which was fairly simple. I used a premade piecrust and a box mix Cook & Serve Lemon Pudding for the filling. The recipe for the pie can be found on the box.

A few weeks later and its Christmas time! Jesus gets a lot of baking on his birthday! I personally made three types of cookies; gingerbread, candy cane cookies, and peanut kisses. Only the candy cane cookie recipe will be published on this website because they are family recipes, but I will give tips. When making any cookie dough where you have to shape it, such as candy canes and gingerbread, make sure it reaches the right consistency. If it is too soft or gooey it will be hard to work with but if you add too much flour it will be dry and crumbly. If you should happen to have dough too gooey and soft, just add some more flour but be careful not to add to much. You can also try wrapping it in plastic and sticking it in the fridge to harden up. If you add too much flour try adding more water, but again be careful not to add to much. If you happen to rip or tear your dough you can wet your fingers and stick the dough back together.

As for the peanut butter kisses, all I can say is make sure the cookie dough is fully or close to fully cooked before adding the kisses to it. If you add the chocolate too early you will have to bake it longer and will burn the chocolate. The lovely thing about chocolate is that in most cases it will hold its shape no matter how long it's cooked but it can still burn and nobody likes burnt chocolate. If you should happen to add the chocolate too early you can always put a piece of foil over top of the cookies. This will trap the heat so as to cook the cookies but not keep it in too long so that the chocolate burns.

Happy Thanksgiving, Merry Christmas, Happy Birthday Jesus, and a Happy New Year!

Sunday, October 30, 2011

Party Snacks

My neighbor was having a party the other day and we had some left over whipping cream in the fridge. My neighbors know i like to bake and I like to take advantage of such parties to bake. So i decided, since we had just enough cream, why not make the nice and easy recipe of cream puffs. While it takes a while to do all the cooking, baking, scooping, and filling, it really doesn't take much effort at all. I might suggest making sure you have all the ingredients before you start. I didn't and i had to borrow some eggs from my neighbors... Anyway it's a crowd pleasing dessert. Because I started making it later, I arrived late to the party but I wasn't even in the house yet when people started pulling them off the tray. By the time I got to the kitchen, there were only four left. Three of those were quickly devoured and the last one only lasted as long as it did because someone set a cake in front of it and people didn't see it.

Sorry the picture is so bad, i forgot to take a picture before i wrapped them up. I promise to post a picture the next time i remember to take a picture.
Because this was a short blog i decided I'd tell you about other crowd-pleasing party snacks! Over the Summer my church got together to watch "I Am Number Four" (which is a pretty good movie by the way but the book is better, I highly recommend both). I took a tray of snacks for everyone to enjoy. The tray was compiled with homemade rice crispy treats, very easy to make, and some chocolate biscotti. The rice crispies have always been highly liked. Last Thanksgiving, my cousin spent the a lot of time hanging out around the treats. My pastor was in love with them. So if your planning a party and you need a quick, easy, and highly lovable, this is for you. The biscotti, not as many people liked. That's really all I can say about it. It would be a good treat with tea, but for a party, not so much. Eat it as something that is just a treat for home, not a crowd.

All these recipes can be found on the recipe page, and on the technique page you can find the best way to melt chocolate quickly and without hassle.
(Rice Crispy Treats)

(Chocolate with White Chocolate Chips Biscotti)

Saturday, October 1, 2011

Welcome!

Well hello there my fellow humans! I am truly sorry that i have not posted in a while. Well this post is about the two welcomes i have made since last posting. 1. I welcomed, along with the rest of my family, Miss Julie from a land far far away, to our home and i welcomed her with a new recipe i had learned, which can be found on the recipe page. 2. Using the same new recipe I welcomed, to my city, nearly two months later, my new pastor.
For both cakes i uses a whipped ganache filling, which is basically a chocolate whipped cream, and very delicious. It makes it all nice and moist and delectable. I used a box mix cake and put the whipped ganache in between the layers and had multiple people tell me, "This cake is really good! And I don't even like cake!" It's a crowd pleaser, that's for sure! Time to talk about the individual cakes:
Well the first one, the one I made for Julie, it was chocolate through and through. Chocolate cake, chocolate whipped ganache, chocolate buttercream icing (all made available on the recipe page.)
 (Chocolate cake with chocolate whipped ganache filling.)
So this cake was rather simple. I baked, I put the filling in the middle, I iced it, then decorated it in a very simple manner. When putting the ganache in the middle, I had the problem with the weight of the cake squeezing the ganache out. I will go into detail on how i fixed this problem in just a minute. So for Julie's cake I did a simple shell border around the bottom in pink icing and then wrote Julie's name in more pink icing (pink was her favorite color.) After that the cake still looked a little plain so i took out of my freezer, some modeling chocolate roses i has used on my birthday cake. Since they don't taste very good anyway, its a good idea to freeze your modeling chocolate creations for re-use, however my recipe was no good so i will not post it. Using some of the leftover icing i glued the roses to the cake and voila! I had a quick and simple cake that was gorgeous and delicious!
(Julie's welcome cake. Quick,simple, and delicious!)

So now for my new Pastor's cake. Pastor Angela had been preaching at our church for several weeks before i was able to give her the cake due to the fact that i was out of town on a mission trip. This cake, as far as the baking went, was very similar to the previous one. It was a box mix cake and it had a whipped ganache filling and buttercream icing. You have all heard of how i said the cake weight was pushing the ganache out, well with this one i solved it. After making the ganache and was ready to use it, i put it in the fridge until it was firmer, then quickly filled the cake. You can put the filling in either by piping it or by spreading it with a spoon or icing knife, i use and icing knife. After filling it i put it back in the fridge to firm up, after that i pulled it back out and iced it and then put it into the fridge once more. This repeated cooling system keeps everything from loosing its shape and pushing out. After I was done with the repeated refrigerating, i pulled it out one more time to decorate. Unsure of her favorite color i chose more feminine colors, pink and yellow.
(Pastor Angela's cake from top.)
Unsure how to decorate it, I started out basic. I Put columns down the side every few inches, then repeated the shell border at the bottom in yellow. Around the top I put also in yellow i put dots around the top edge. Feeling it was too much yellow, I put tiny pink dots on top of the yellow ones and around the shell base. Noticing it was still incomplete, I tried a technique i learned from watching "Cake Boss." I piped the icing out of a small round tip and let gravity pull it down until i came to the point where it looked some what like drapes. To cover the ugly spots where the drapes came together I put little pink flower. And then of course i piped "Welcome Pastor Angela" on top, and enunciated it by putting yellow lines around it, evening the colors once more.
(Pastor Angela's cake from the side-ish.)

Tuesday, June 21, 2011

Summer

Hooray!!! It's the first day of summer today. Yahoo! For my family, however, not only is it the first day of Summer, but it's also my grandpa's birthday. This year I did not make anything, but thankfully I'm still trying to get you all caught up on all my previous baking, so i shall talk about the cake i made last year.

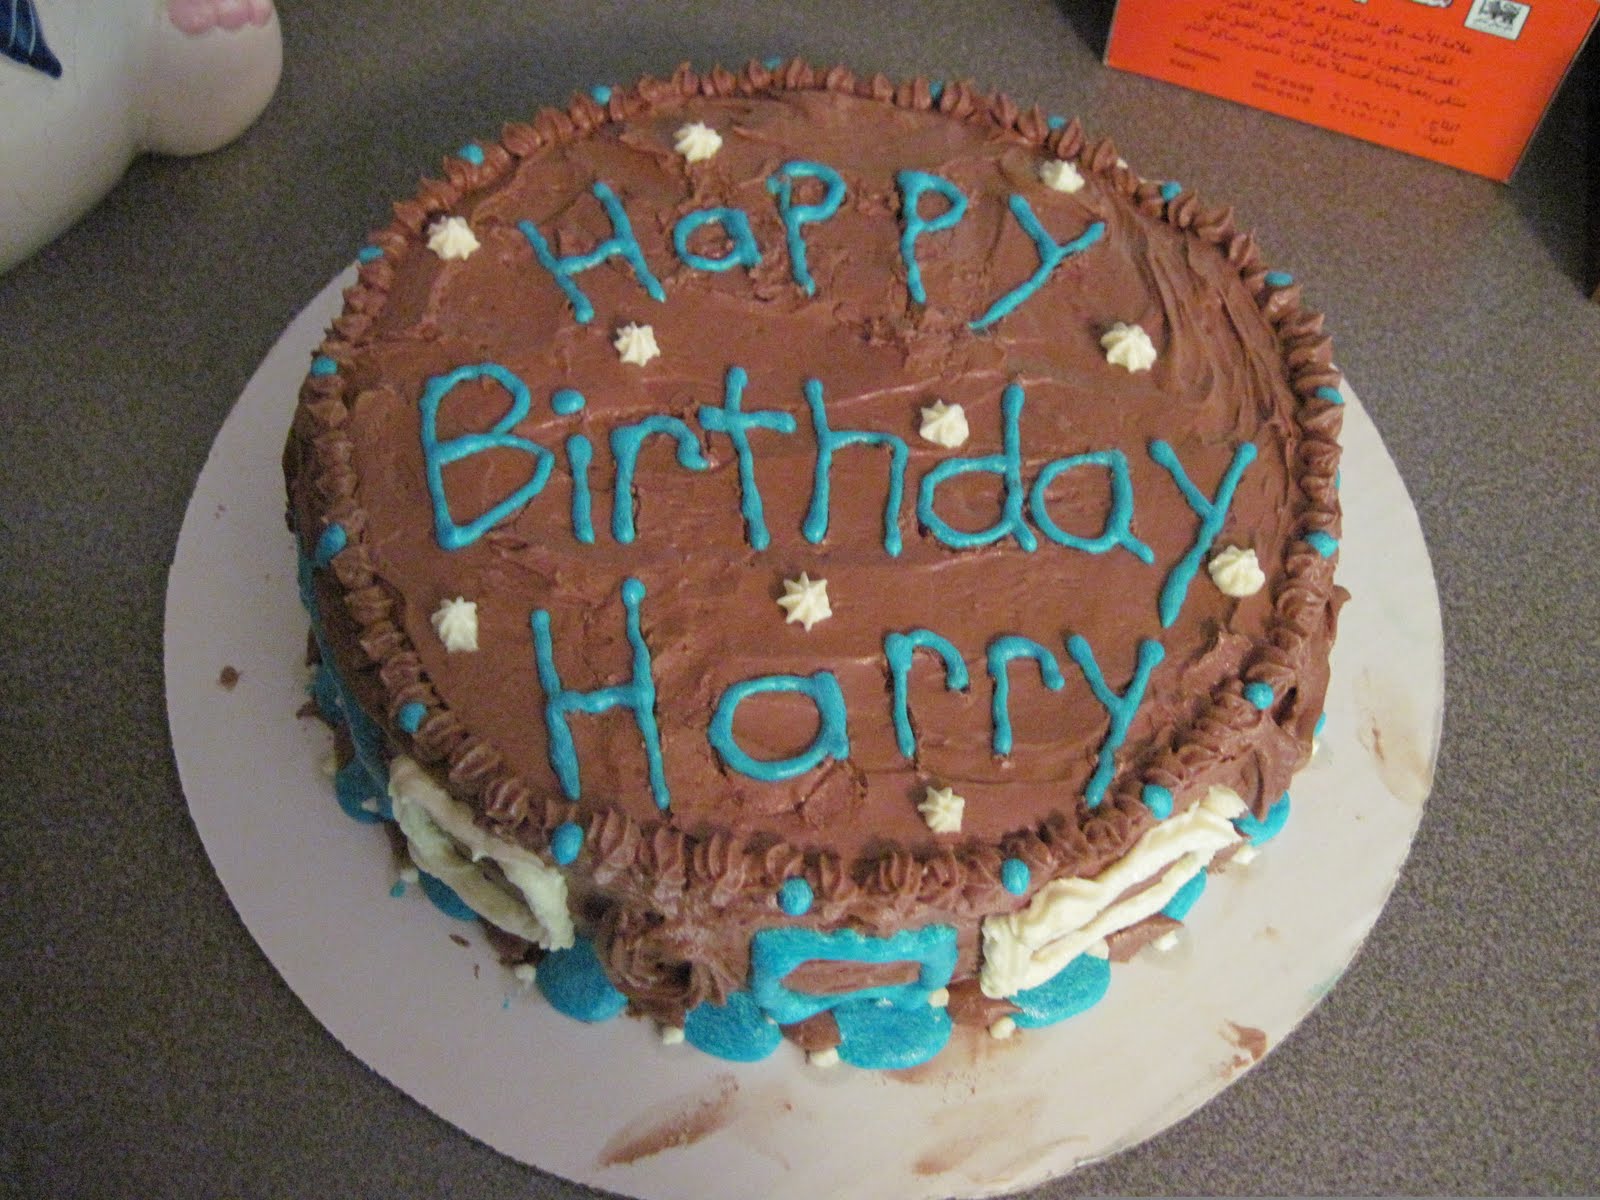
So this is the cake that I made for my grandpa for his birthday. That time instead of doing two cakes in one day like i did the first time i baked, I this time made two cakes in one week because it was the same week as Fathers Day. As you can see, in this cake, I used a chocolate butter cream icing. for some of the decorations, all the blue icing, I simply took the chocolate butter cream and didn't add the cocoa to it. Trust me that was a VERY bad idea. The icing was runny and drippy and dripped all over the place. When i piped it onto the cake it ran all the way down the sides, as you can see at the lower left. Also when i added the blue coloring to the de-cocoa-afied icing, it wouldn't mix in all the way! Even after i mixed it to the best of my ability, you could still see swirls of white, as you can see in the lower middle. However, thankfully, some of the icing came out perfectly fine, as shown in the lower right.


Now for some advise for all of you. For one thing, if you're going to do a cake like this, where you take it out of the pan and decorate it, do a border. Always do a border on cakes like this. Without a border you will see more of the mistakes and creases in the icing where you switch between icing horizontally and vertically. It also shows where you ran into the cake tray if you don't put a border. Another advantage to doing a border is that it breaks up the cake for the eye and it's not quite so hard for people to take in. Of course there are exceptions, but I'll not get into those now, least I confuse you if I haven't already.


More advise? Make it interesting. however it is possible to make it too interesting. Make sure you reach the balance in between. A cool decorating trick for candles, at least I think it's cool, is when your decorating the cake to put on the top of the cake, or where ever you want the candles to go, little dots or flowers or something. This way when you put the candles in the have a nice little border and it doesn't look as much like you are massacring the cake. Well I hope I've helped you out a little bit. Thanks for reading! Check in again sometime soon!


Saturday, June 18, 2011

First

This is my first post. I've never blogged before so please excuse me for any amateurishness that appears on here. Well I have to catch you guys up on a year. A year and a month ago I began my baking career. The most i had ever baked was chocolate chip cookies. I had been watching an anime called "Yumeiro Patissiere" Yumeiro meaning dream-colored. It really inspired me and i learned a lot, surprisingly, from the show. Anyway, it was the end of the school year and my teacher, who had been out on maternity leave, was coming back for the last week of school. I decided i would make her a "Welcome Back" cake. I couldn't decide whether to do chocolate or yellow cake though, so finally i settled on both. I started the cakes on the Sunday that would signal the last week of school. I was in the kitchen for 9 hours of non-stop baking and decorating. Add on top of that, it was 90 degrees outside, our air conditioning was off and all doors and windows open plus i had the oven going. i was so worn out when i finally went to bed. Now the cakes didn't turn out very good. The candy flowers melted in the heat, the recipe i used made the cakes really dense, but for my first try they were really good. For the one cake i did a simple, but beautiful, basket weave on the side that is really quite simple. For the second I did lines to look like ribbons coming up to the top of the cake with candy roses on top. The second cake was terrible.

How to Make a Basket Weave:
          All you have to do is pipe lines vertically on the cake with a good amount of space in between them. Then you just pipe lines horizontally over the vertical lines to the crease between the two bordering lines and you continue to do this in an alternating pattern to create the illusion that the icing was woven.


cake 1cake 2
Basket Weave