Tuesday, August 21, 2012

Congratulation Class of 2012

Ah, graduation. Diplomas, confetti, parties, gifts but best of all- cake. A close friend of mine recently graduated in the class of 2012 and I had the pleasure of making the cake. It was huge of course for a small one would not feed everyone at the party. Because she made the decision to go far away to The Ohio State University I decorated her cake in the infamous Ohio State "O" and Brutus The Buckeye. I also added her graduation year in the university's colors- red and grey- and mimicked the font of the "O".
(The entire completed cake.)

Now I'm pretty proud of the job I did on this. I was mimicking pictures I had found on the Internet like I normally do. I searched Google for what I wanted, printed it off, then sketched it into the icing with a toothpick. I wanted to add more detail to Brutus but he was so little I couldn't get in the minute details. Also, just a quick note, the thing between his legs is a towel that quarterbacks use to wipe their hands.


(Icing Brutus and Real Brutus)


(Ohio State "O", Buckeye, and Oak Leaf)


Wednesday, July 11, 2012

Emergency Cake Surgery

(Finished cake)

So a few weeks back my former English teacher had a birthday and he is so awesome I decided to make him a cake. Its a very simple cake with stenciled words I cut out myself and chocolate frosting. Just so all of you know, making your own stencils is a pain in the butt. First you have to find what you want to stencil, then adjust the size on the computer, print it off, and finally cut it out. If it is small its not so bad, but apparently cutting out "Happy Birthday" in fancy font is no easy feat.

(Stenciled words made out of sugar sprinkles.)
(Homemade stencils.)

The first attempt at the cake did not go so well. I had tried to make it a chocolate cake with delicious whipped ganache filling and a chocolate buttercream icing, however I accidentally over mixed the ganache (at least I think that's what I did) and it didn't quite turn out correctly. I tried to salvage it and make it work and, even though it tasted just fine, it refused to stay between the layers. I quickly iced the cake trying to trap it in but still the ganache found a way out by pushing the icing off. I quickly stuck it in the fridge to try to firm it up, however my attempt were futile and I was left with this:

(Whipped ganache pushing icing off the cake)
 
After realizing my original plan would not work i tried to use what I was left with by pulling the layers of cake apart and scraping off the ganache. It was important to get all the ganache off so that the cake wouldn't absorb it and become too moist. I then re-iced the cake and stenciled on the words. The chocolate buttercream frosting (recipe page) was a huge hit. I received multiple compliments on it and some people said that was their favorite part. After everyone got through with the cake I was left with only leftover icing to take home (pictured below). However my friend Shelby later got a hold of the cake carrier and when she was done it did not look like there had been a cake on it at all.
(The cake after the party was over)

Monday, May 21, 2012

Five-Minute Chocolate Cake

So for all you girls out there, I know that you , like me, often get chocolate cravings. Mine are constant and I'm always wanting a nice big hunk of chocolate cake with some fudge on top. Mmmmm. That is the best. So when a friend of mine gave me a recipe for a chocolate cake in a cup that only takes five minutes to make I had a field day. It is so delicious and if you make it right it is so moist.
(A picture of my cake in a cup and some yummy syrup for on top.
Yes, this is my own picture.)

Now the recipe says that it is optional to add the syrup on top. I tried it first with out and while it was good, it was definitely missing something. So I got into our fridge and dug around and viola! Smucker's Chocolate Sundae Syrup. I drizzled some over top and Oh! it was the icing on the cake (pun intended even if it was cheesy). Also, I recommend making it with normal sized chocolate chips not the mini ones. I made it with the minis the first time and it turned out rather dry but when i used normal sized ones it was quite moist. Make sure the mug you are using is microwave safe and it won't blow up in any one's faces or have gold paint start a fire or anything like that. I do not take any responsibility for any kitchen accidents, not that they are likely. One last thing. The amount of cake the recipe produces can be quite a lot so don't eat it when you are too full. Enjoy!

Tuesday, April 17, 2012

My Inspiration

So i know it's been a while since i posted, but I've gotten caught up with a bunch of work to do and haven't had much time to bake. However I thought I'd give you a little insight into my inspiration for baking. I am not much into anime or manga as some people are but there is one show that I absolutely love. It is a show called Yumeiro Patissiere. It is a wonderful show about a young girl going off to culinary school without any prior training and being put with the best kids in the school.  She must learn to make friends and hone in her talent. Through this show comes my love for baking. One thing she is always saying is that you have to put happiness into the food. And I've noticed that this is true. Your food will most definitely taste better if you put the joy of baking into it instead of doing it grudgingly. Here is the theme song and a link to watch the show. Just try it, even if you don't like anime. Don't forget to add happiness, love, and joy to your food!
http://www.youtube.com/watch?v=KJfGNnqKEZk
So there is the link for the song and below is the link for the show. And one more thing. If you scroll down to the bottom of the home page you can see a picture from the show. Just thought I'd say that. Enjoy!
http://www.crunchyroll.com/yumeiro-patissiere

Monday, January 16, 2012

Happy Thanksgiving & Merry Christmas

So sorry about the long wait! You know the holidays. Rush, rush, rush. So i supposed I'd better start out with the items i bakes for Thanksgiving. To begin, i only made two items. Rugelach cookies and lemon meringue pie. Rugelach is a type of cookie originating somewhere in the Middle East. I have had people from Iraq tell me they are Iraqi cookies and people from Israel say they are Israeli and books tell me they are Jewish, but it is always somewhere in the Middle East so that is all i can tell you about their background. The recipe I use may not be quiet as authentic as you might find in the Middle East, but some personal friends of mine from Iraq say the recipe is very authenic.

It is a small cookie in the shape of a cresant with a chocolate filling most commonly but it can have other fillings as well. To make it you simly mix up the dough, refidgerate it for awhile, roll it out, spinkle the filling, cut into wedges and roll. If you are feeling lazy or are in a hurry, you can skip the wedges, roll, and then cut, making the cookies more of a pinwheel than a cresant. Be careful of adding too much filling or the cookie will be messy. It is absolutely delicious. The dough is sweet and soft, and so creamy (probably a result of the cream cheese) and the filling is chocolately with a hint of cinnomin making the chocolate filling irrisistable.
Also for Thanksgiving I made a Lemon Merinque Pie, which was fairly simple. I used a premade piecrust and a box mix Cook & Serve Lemon Pudding for the filling. The recipe for the pie can be found on the box.

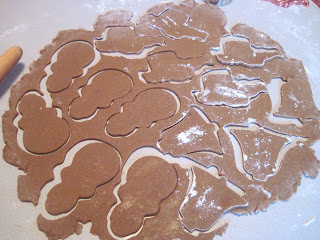
A few weeks later and its Christmas time! Jesus gets a lot of baking on his birthday! I personally made three types of cookies; gingerbread, candy cane cookies, and peanut kisses. Only the candy cane cookie recipe will be published on this website because they are family recipes, but I will give tips. When making any cookie dough where you have to shape it, such as candy canes and gingerbread, make sure it reaches the right consistency. If it is too soft or gooey it will be hard to work with but if you add too much flour it will be dry and crumbly. If you should happen to have dough too gooey and soft, just add some more flour but be careful not to add to much. You can also try wrapping it in plastic and sticking it in the fridge to harden up. If you add too much flour try adding more water, but again be careful not to add to much. If you happen to rip or tear your dough you can wet your fingers and stick the dough back together.

As for the peanut butter kisses, all I can say is make sure the cookie dough is fully or close to fully cooked before adding the kisses to it. If you add the chocolate too early you will have to bake it longer and will burn the chocolate. The lovely thing about chocolate is that in most cases it will hold its shape no matter how long it's cooked but it can still burn and nobody likes burnt chocolate. If you should happen to add the chocolate too early you can always put a piece of foil over top of the cookies. This will trap the heat so as to cook the cookies but not keep it in too long so that the chocolate burns.

Happy Thanksgiving, Merry Christmas, Happy Birthday Jesus, and a Happy New Year!

Monday, November 7, 2011

Recipe Page

Hey everyone. You will notice with the recipe page that in the cream cheese frosting it has random ingredients at the bottom. that is the recipe for the cream for the cream puffs. Sorry about that I'm not sure why the page messed up but I will have it fixed as soon as possible. Thank you for your patience.

La Dia de Muertos

Happy Halloween and Day of the Dead everyone! Surprisingly i have alot of stuff to tell you guys about in this 2 day time span! For Halloween i went to a Halloween "party" and the hostess is pregnant so i combined a Halloween cake and a baby cake in one! It took alot of icing but it was pretty easy. The recipes are already on here and i don't have much to tell you about the cake so I'll just post pictures and get on with the Day of the Dead.
So basically I put a spider web on it and then a mom pumpkin a dad pumpkin and a baby pumpkin. Pretty simple right? Here are some pictures of the cake as I was making it.

Anyway, enough with that cake! It's time to talk about La Dia de Muertos, The Day of the Dead! Now for a little bit of background and fun facts, the day of the dead that I will be talking about is the Mexican one. The day of the dead was a way for Catholic, in some European countries, to help allow cultures keep their traditions of dressing up and warding off spirits but in a more Christian way of honoring the dead. In Mexico, families will decorate their dead loved one's graves with flowers and other decorations. Families also set up shrines dedicated to the dead and decorated with more flowers and some special decorative paper that i forget the name of. Food and water are set out to strengthen the wandering souls. Incense is set out so that the scents will guide the wandering souls. Pictures of the Virgin Mary, or the Virgin Guadalupe are also set out. Fun Fact:  Grave sites in Mexico are rented, not bought. If the rent is not paid the body will be removed and the site re-rented.

Food commonly eaten during the Day of the Dead is, The Bread of the Dead a.k.a. El Pan de Muertos, Gravel Salad, Antejitos, Tacos, churros, Tres Leches (three milks),and Meatball Soup. I ate all of these on the Day of the Dead, which actually lasts two days by the way, at a party and they were quite delicious although the Tres Leches was too sweet.

I apologize for any incorrect information, all of this i learned in an informational video at the party.